Installing Uboot over factory default
 The first step in preparing an HLK-RM04 module for your own use is to enable the Uboot loader. Uboot is a full featured, bootloader that initializes the system on a chip so that it is ready to run Linux. Uboot include a TFTP loader so that you can transfer images to your module over Ethernet. This first step is only applied once to create a module that can be re-configured easily. A word of caution; if you loose power or download a faulty uboot.img you will brick the module. The only recourse will be to unsolder the SPI flash and replace it with a working device.
Network
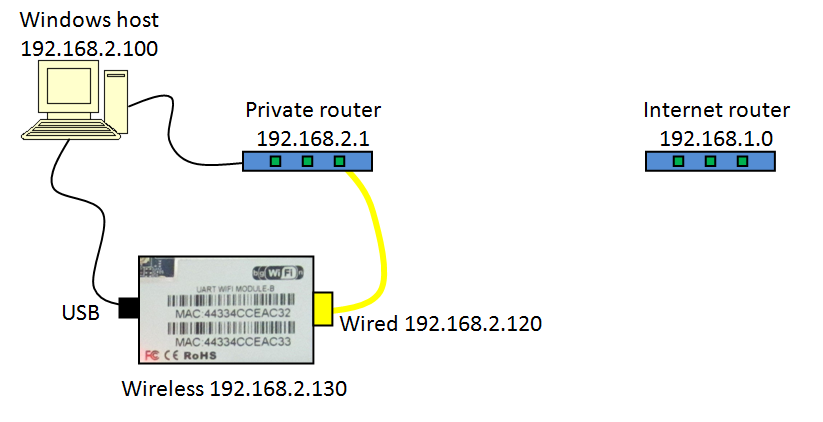
My network topology looks like this. There are two independent networks. My development network is isolated from the internet while a second router provides a wireless internet gateway. You will need to define your own network topology and assign IP address to your module to get the board up and running. This can be complex , but if you can’t configure your home network and router you are going to have a very rough ride using embedded Linux computers.
Host PC 192.168.2.100
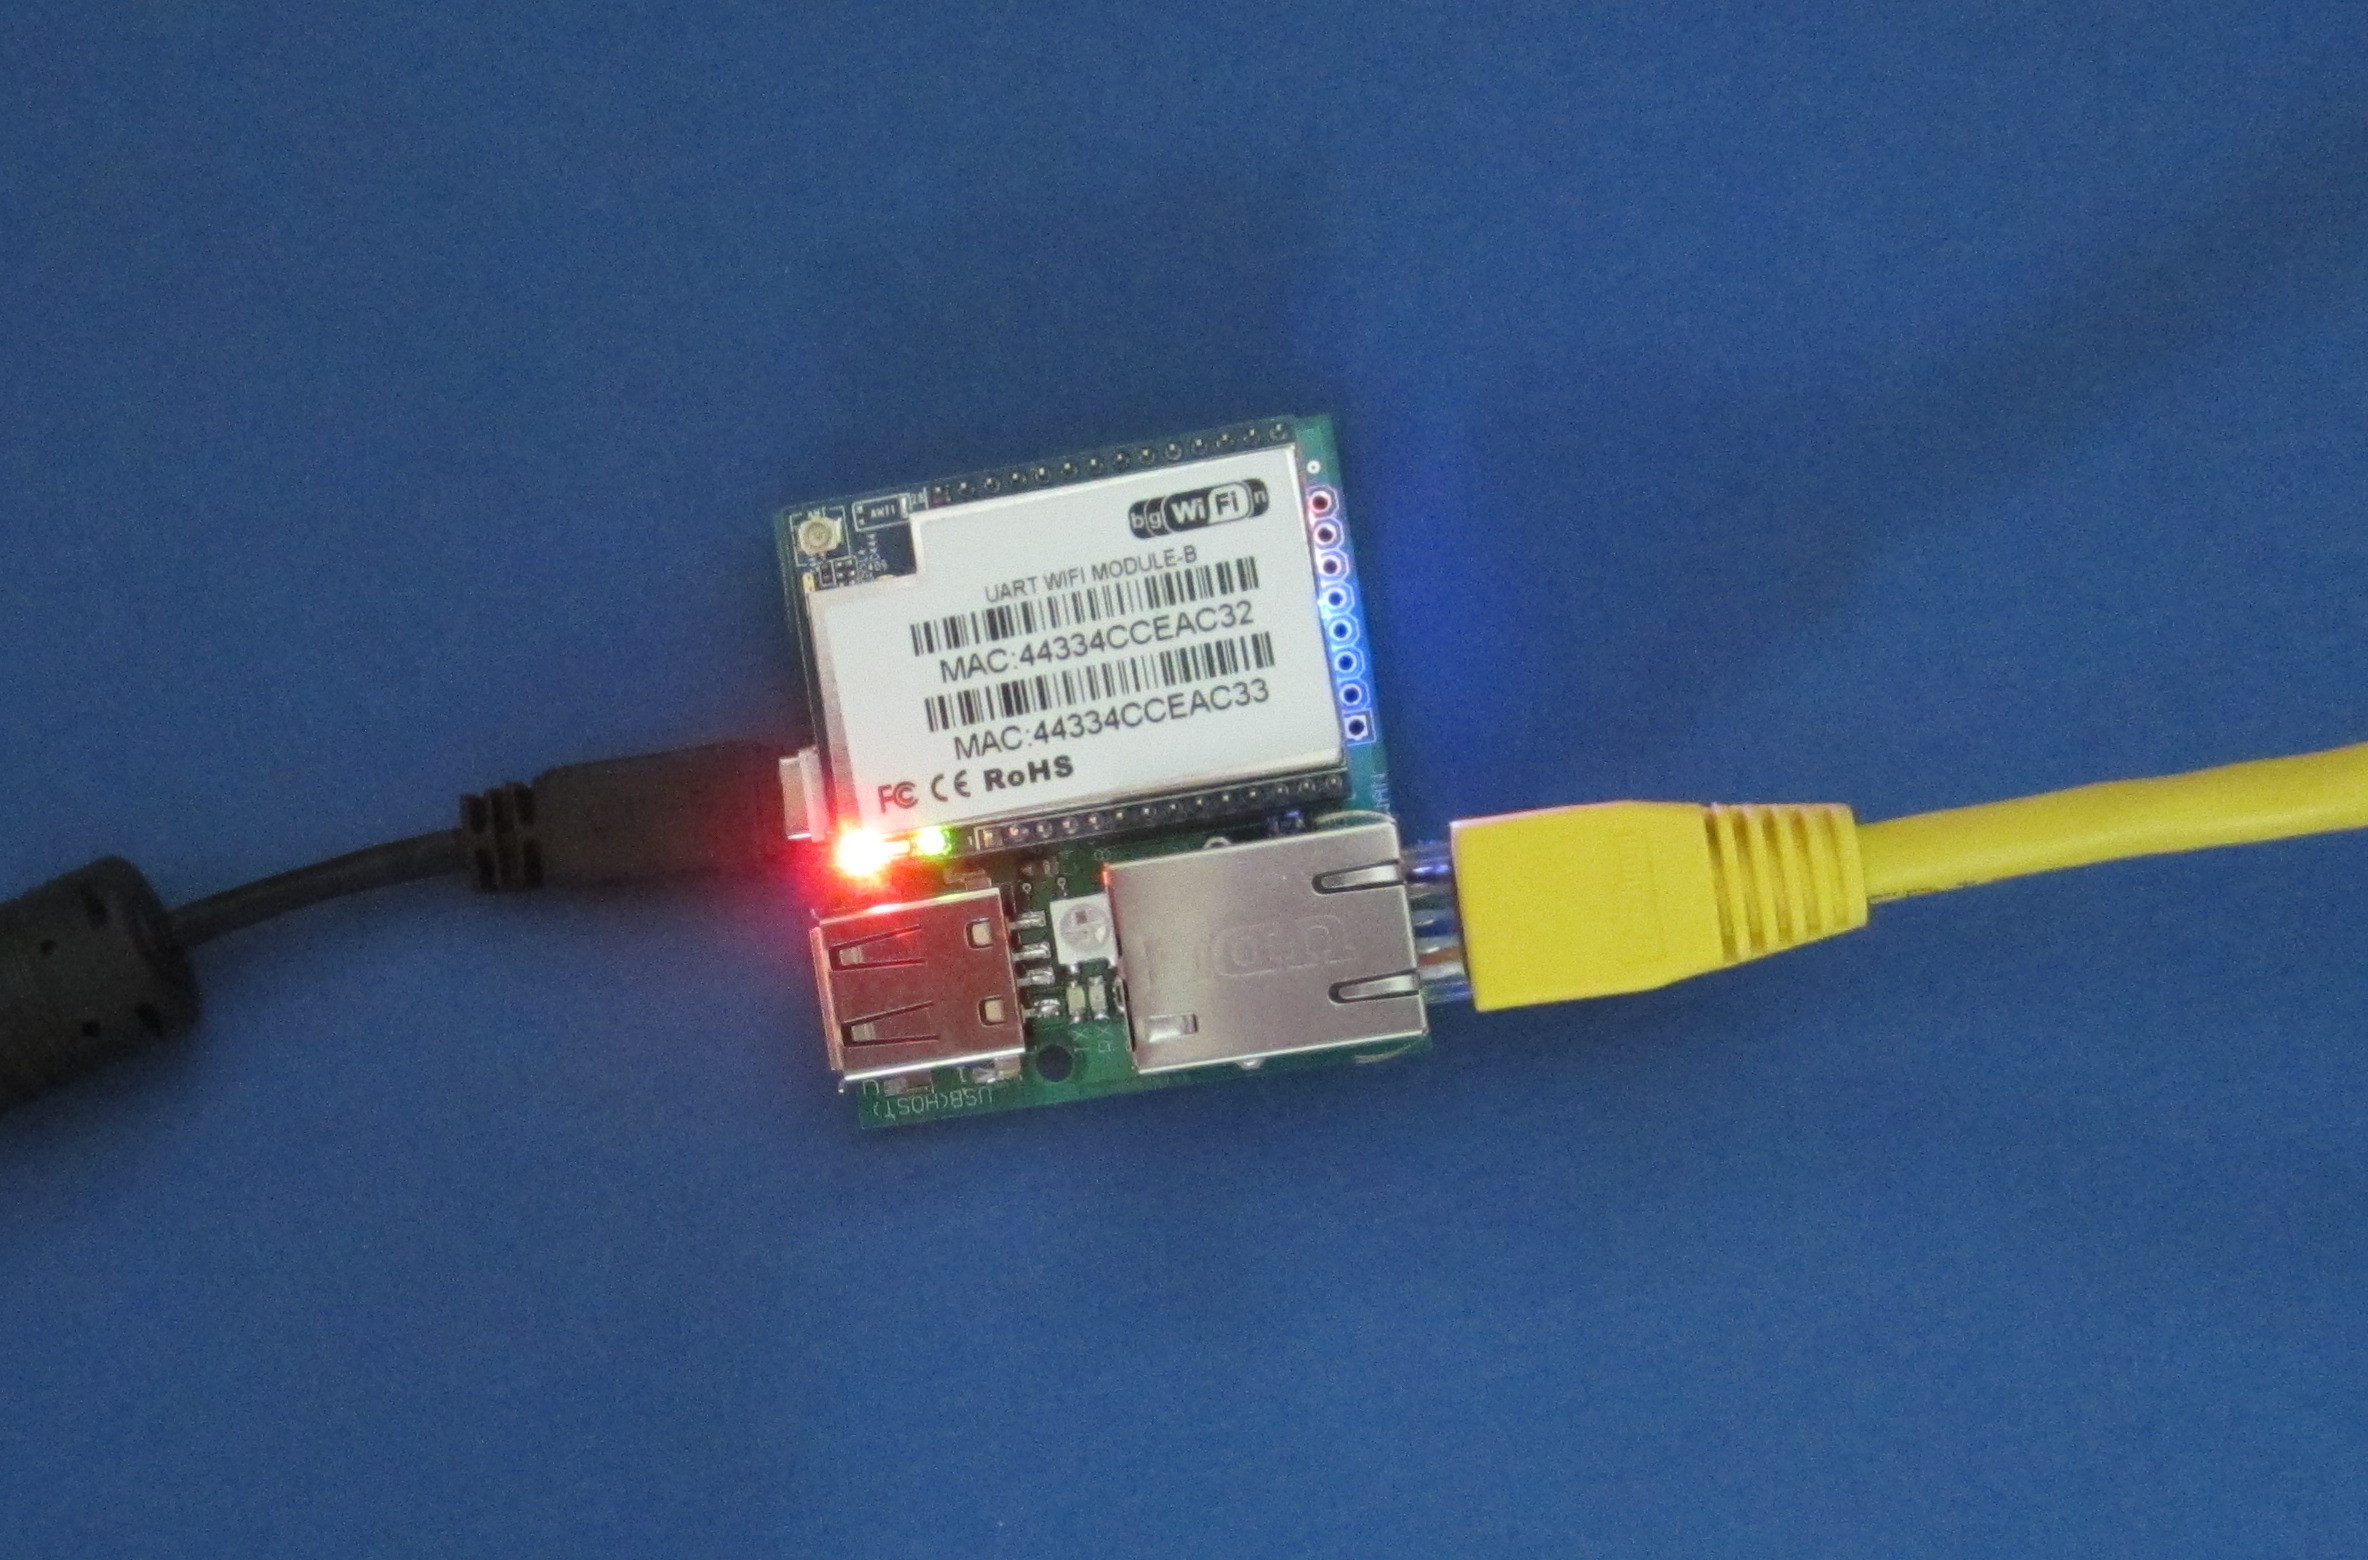
HLK wireless 44:33:4C:CE:AC:32 192.168.2.130
HLK wired 44:33:4C:CE:AC:33 192.168.2.120
Internet gateway 192.168.1.0
Private router(DNS server) 192.168.2.1
Installing Uboot
The original factory code for the Hi-Link module does not support TFTP loading of new Linux images so we need to replace the default boot loader with Uboot. When this step is complete the module will only boot to the Uboot prompt. From Uboot we can load our own image. The Uboot loader provides a variety of options for copying new Linux images to the module. I am running a Windows machine to perform these operations.
- On Windows click the Start icon and run the “cmd” command to open a command window. Type “ipconfig /all” and search the results to find out the Default Gateway. In my case it is Default Gateway . . . . . . . . . : 192.168.2.1
- Using the first three numbers of the default gateway 192.168.2.x I selected an address for the module which is visible on your home network.. You can read the second MAC address off of the module label and use this to install a static IP address for the Ethernet MAC address. I set my router to deliver a static IP address 192.168.2.120 for the Ethernet port of the HLK module.
- connect the HLK-RM04 WAN port to your PCs router and power up HLK-RM04
- This step is critical!!! Access http://192.168.2.120/adm/hlk_update_www_hlktech_com.asp Notice you will only get the boot loader upgrade option at this address. The upgrade option available in the GUI only supports firmware upgrades of the Linux OS.
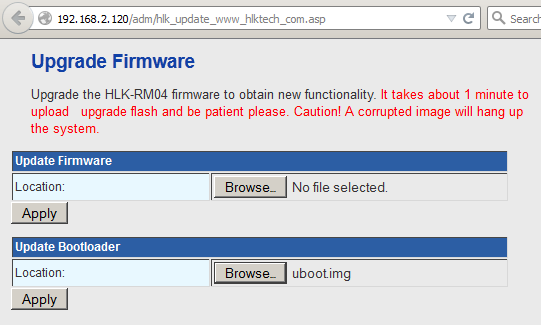
- find Update Bootloader option, click Browse, then select uboot.img, click Apply then click OK to make sure.
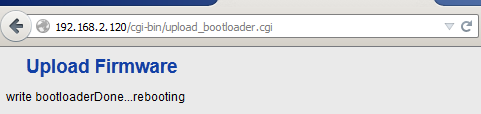
I used the files located here uboot.img (Make sure you change the file name to uboot.img This file works with the 32M module.) - At this point you have replaced the Hi-Link loader with Uboot. If you reboot the module using a power on reset, with the serial port connected and set to 57600 baud you will see the U-boot loader starting up.
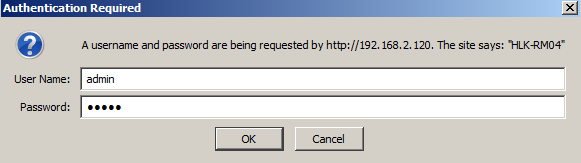
From a web browser login at http://192.168.2.120. Use admin/admin for the username and password.
Setup Uboot Environment
Connect to the module using the USB serial port set to 57600bps. This allows you to configure the Uboot environment variables. Reset the board and wait for Uboot to present the startup menu. Choose the fourth option by pressing “4” to force Uboot to enter its command line interface. Initially the boot delay is set to one second so you don’t have much time to enter the number “4” or the module will boot to Linux. If you allow Linux to start you can always type “reboot” and enter the number “4” as the system reboots. From the Uboot console window you can change the default boot operation as follows. The commands you need to enter are highlighted in bold.
RalinkUBoot Version: 3.5.0.0
…….
Please choose the operation:
0: Load system code then write to Flash via Serial.
1: Load system code to SDRAM via TFTP.
2: Load system code then write to Flash via TFTP.
3: Boot system code via Flash (default).
4: Enter boot command line interface.
7: Load Boot Loader code then write to Flash via Serial.
9: Load Boot Loader code then write to Flash via TFTP.
You choosed 4
4: System Enter Boot Command Line Interface.
U-Boot 1.1.3 (Apr 7 2015 – 17:07:11)
RT5350 # setenv ipaddr 192.168.2.120
RT5350 # setenv serverip 192.168.2.100
RT5350 # setenv bootdelay 5
RT5350 # setenv bootfile dnclabs-sysupgrade.bin
RT5350 # saveenv
The IP address of the HLK-RM04 module is the one you assigned it when you configured your router to respond to a DHCP request from the modules MAC address. The reason we paired the MAC address to a statically defined address on the router is so that it never changes and we can then automate Uboot to match the address.
The server IP address is the address of your host computer that will be running a TFTP daemon to download code to your module. You can use “ipconfig/all” from a cmd command window to see the assigned address of a Windows machine. The boot delay is measured in seconds and is set to 5 to give me lots of time to select a Uboot option before it defaults to boot option 3 which starts Linux. The bootfile is the name of the binary file that will be downloaded to the module when you select TFTP. This name matches the image name that I created in OpenWrt so it saves me time re-typing it. The final saveenv command stores all of the changes to SPI flash so that the changes are persistent
32M module defaults
As a reference here is the default Uboot configuration for a factory fresh HLK-RM04.
U-Boot 1.1.3 (Apr 7 2015 – 17:07:11)
RT5350 # printenv
bootcmd=tftp
bootdelay=5
baudrate=57600
ethaddr=”00:AA:BB:CC:DD:10″
ipaddr=192.168.1.1
serverip=192.168.1.100
ramargs=setenvbootargs root=/dev/ram rw
addip=setenvbootargs $(bootargs) ip=$(ipaddr):$(serverip):$(gatewayip):$(netmask):$(hostname):$(netdev):off
addmisc=setenvbootargs $(bootargs) console=ttyS0,$(baudrate) ethaddr=$(ethaddr) panic=1
flash_self=run ramargsaddipaddmisc;bootm $(kernel_addr) $(ramdisk_addr)
kernel_addr=BFC40000
u-boot=u-boot.bin
load=tftp 8A100000 $(u-boot)
u_b=protect off 1:0-1;era 1:0-1;cp.b 8A100000 BC400000 $(filesize)
loadfs=tftp 8A100000 root.cramfs
u_fs=era bc540000 bc83ffff;cp.b 8A100000 BC540000 $(filesize)
test_tftp=tftp 8A100000 root.cramfs;runtest_tftp
stdin=serial
stdout=serial
stderr=serial
ethact=Eth0 (10/100-M)
Environment size: 767/4092 bytes
RT5350 #