I was thinking about how I might design a better looking body for my paper car designs. I needed the design process to be simple to allow young students to design their own car bodies which could be 3D printed. The difficulty with traditional design tools is they are complex to learn and since the students starting point is a familiarity with Tinkercad I needed a slick way to jump start the design process.
Everybody is familiar with 2D drawing so I decided to use Inkscape as a 2D design capture tool. Then by simply drawing the side view and front view of a 3D object I can create a more complex model. The Inkscape designs are exported to dxf files and assembled into a 3D object using OpenSCAD. Before the crying starts I have written a simple script that will merge the side.dxf and front.dxf into a solid car body. There is no need to code in OpenSCAD unless you want to push the design limits. For now I think the process is pretty easy to use.
Side perspective
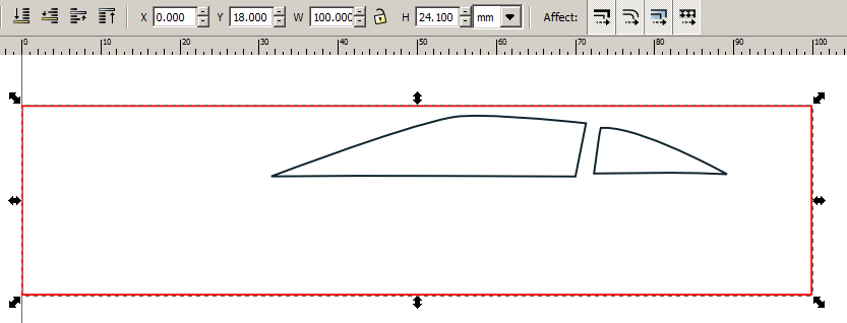
The first step is to draw the side perspective view of the car within a well defined bounding box which is 100mm x 24.1mm. Note that the baseline of the drawing is offset 18mm in the Y direction and 0mm in the X direction so that the object is imported at the origin in OpenSCAD. Save the file as side.dxf.
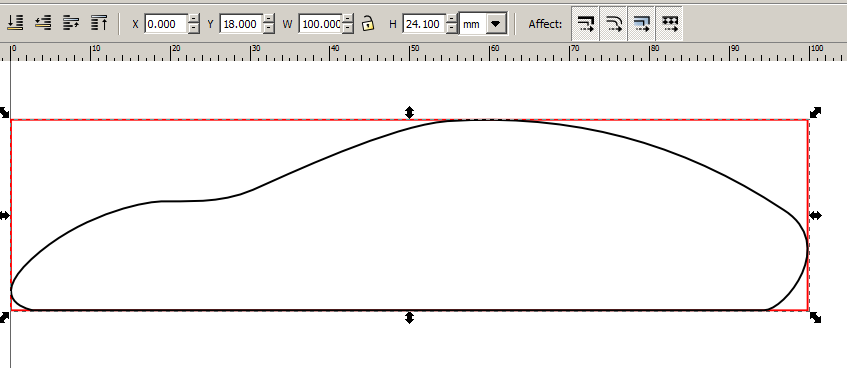
The bounding box is used as a construction guide and the dimensions are rather arbitrary except that I use them in the OpenSCAD script. If you alter the size the OpenSCAD design will need to be modified. The idea is to draw your side view to fit the limits of the bounding box. Once your happy with the design you can delete the construction lines and export the side.dxf file.
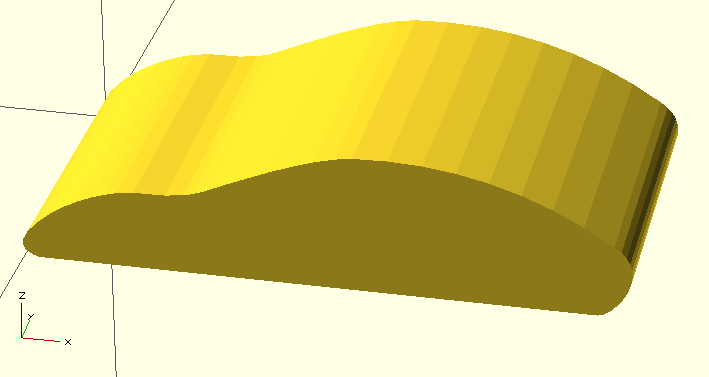
module step1()
{
	linear_extrude (height=50)
	import(file = "side.dxf");
}
Front perspective
The next step is to draw the front perspective view of the car within a well defined bounding box which is 50mm x 24.1mm. Note that the baseline of the drawing is offset 18mm in the Y direction and 0mm in the X direction so that the object is imported at the origin in OpenSCAD. Save the file as side.dxf.
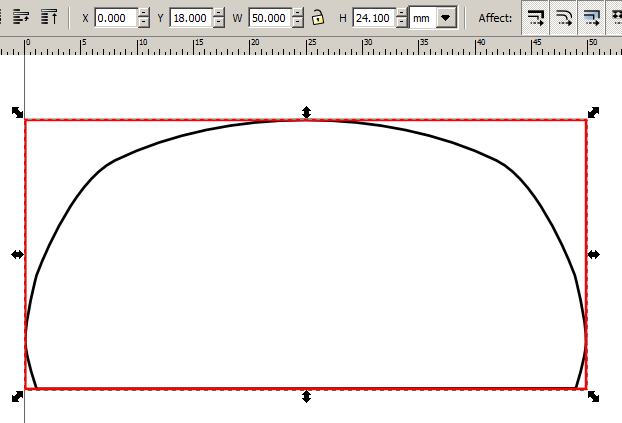
TIP: To create a symmetric view in Inkscape I start by drawing the front view as an angular line object. Then with the node edit tool I make the left and right nodes mirror images of each other. You can use the XY coordinates to fine tune the node positions. Finally I select each node and apply a symmetric curve to the node. Make sure you don’t move the control points or you will lose control of the symmetry.
module body()
{
	intersection(){
	linear_extrude (height=50)
	import(file = "side.dxf");

	rotate([0,90,0])translate([-50,0,0])linear_extrude (height=100)
	import(file = "front.dxf");
	}
}

Hollow out the car
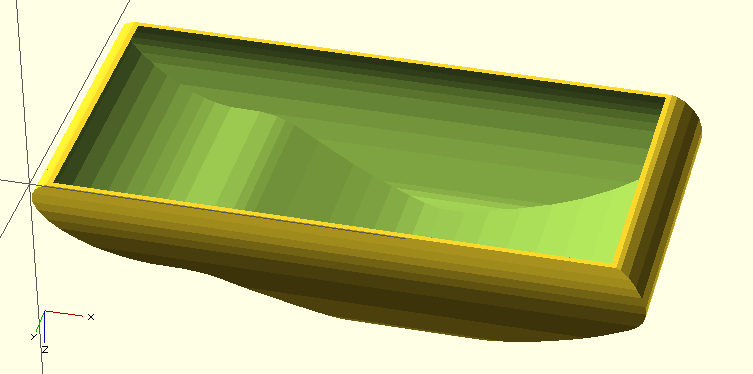
The car as drawn is a solid object that will take a substantial time to print so I decided to hollow it out. I did this by creating a duplicate of the body and shrinking it so that I would be left with 1mm walls for the car body. Notice that I have scaled the X axis to 98% of the 100mm length so that I have 2mm of difference in the X length. I then offset the X axis by 1mm so that there is a 1mm front and rear wall. The Y axis only needs a 1mm scaling because the bottom is open. The Z axis is 96% of 50mm or 2mm and again I offset the Z axis by 1mm.
module car()
{
	difference(){
		body();
		translate([1,0,1])scale([0.98,0.99,0.96])body();
	}
}

rotate([90,0,0])car();
As you can see the underside of the car body has been hollowed out.
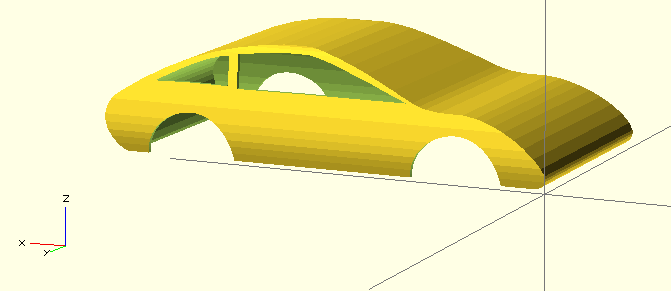
A few details
The car looks pretty good but adding a few details makes it look great. I also drew a side perspective of the windows so that they could be removed from the finished car design. You can duplicate the side view of the car as a reference while drawing the windows. Once your happy just delete the excess lines before exporting the dxf file. Along with this change I added wheel hubs. The hubs are just cylinders that cut through the side of the car. If you prefer these could be drawn in Inkscape as part of the window design file.
The code looks like this.
module car()
{
	difference(){
		body();
		translate([1,0,1])scale([0.98,0.99,0.96])body();
		linear_extrude (height=50)
		import(file = "side_windows.dxf");
		rotate([0,0,90])translate([0,-20,0])cylinder(h=50,r= 10,$fn=100);
		rotate([0,0,90])translate([0,-80,0])cylinder(h=50,r= 10,$fn=100);
	}
}

rotate([90,0,0])car();
The final operations in OpenSCAD are to render the design using the F6 key. Then export the file in STL format in order to print it. This design has an unsupported roof so you will need to print the design with supports on or the roof will collapse. Happy printing.
Design Files:
side.svg, front.svg, side_windows.svg, Quick_car_layout.scad
Rename the file extensions from *.txt to *.svg or *.scad as shown.