 I am re-visiting the paper car design in an attempt to make it more user friendly. Specifically I want to be able to guarantee that I can successfully complete a workshop with children as young as 10. While the initial car design was great as a one on one project it is difficult to build in a group setting. The key problems are that laying out the foil takes to long making completing the car in a three hour workshop virtually impossible for the children.
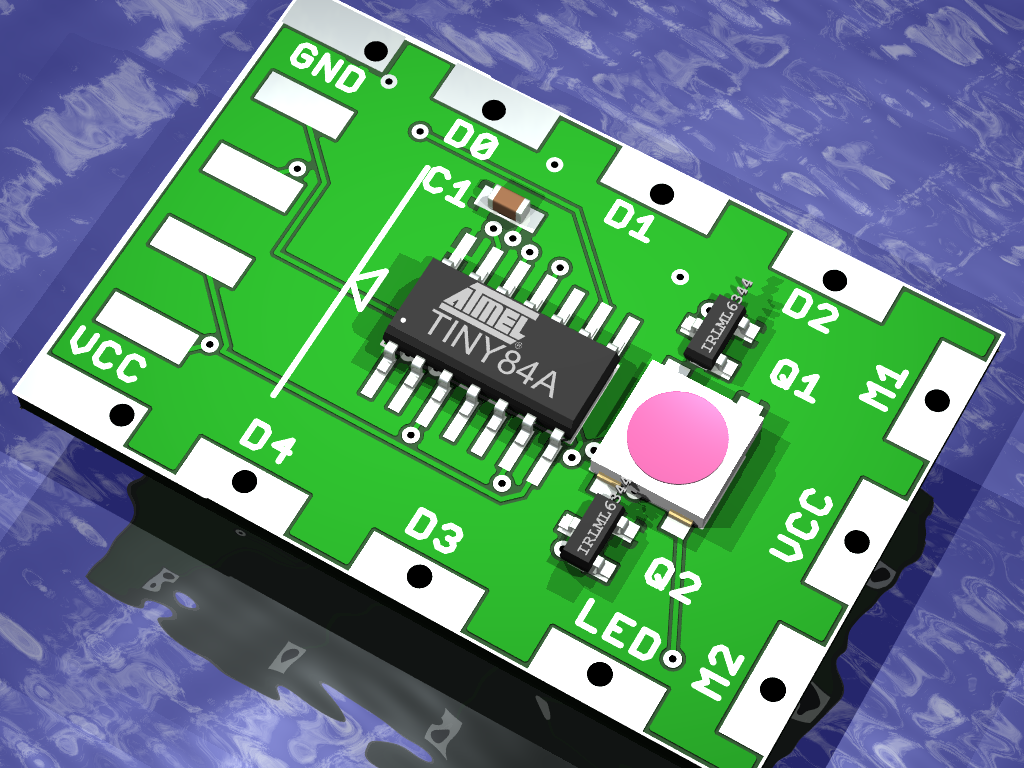
To address the assembly time I am thinking that I will create a pre-assembled printed circuit board which eliminates most of the copper foil assembly. The design still requires some minimal foil circuits to be added to power the board, and the motors need to be soldered so the personal ownership of the finished design is still present. The design encourages customization for more advanced students; for example the card can be changed to include headlights or signal light. The down side to developing a PCB is that the cost goes up because of the extra materials and I end up with a lot more labour to assemble and test the PCBs. On the up side the workshop is easier to deploy and the results are all but guaranteed.
There are a few design decisions that need to be worked out before finalizing the PCB. In the next few sections I try to describe the issues and potential solutions.
Programming
Programming the car is problematic because unlike and Arduino UNO that you can upload your code to the paper car does not come with this capability, an external programmer is required. During a workshop I can provide programmers for this purpose but after the workshop the students are left with no way to keep working on there car at home. When the students leave the workshop they are stuck with the code that they created during the workshop. I see three options for improving on this but none of them are entirely satisfactory mainly because of the cost.
- The car can be configured using a custom programmer which would cost ~$20. That is, in addition to the car I could build a set of programmers and anyone who wanted one could buy it for $20. This is the same programmer that I would use in the workshop so it doesn’t really represent additional work.
- The car can be configured using an Arduino using a flat ribbon cable and connector mounted to a PCB. The cable harness would cost ~$10 but you would need an Arduino as well. The other issue with using an Arduino for this is that you would need to program the Arduino and wire up the cable every time you want to change your code in the paper car. This procedure could be made to work but I expect that it would be quite difficult for most beginners. It also would require new development to sort out the Arduino code.
- The final option is intriguing and may be worth exploring but it requires significant development. Using the ATTiny84 it is possible to create a virtual USB boot-loader on the chip using a bit bang implementation of the USB1.1 specification. The code is based on the work of V-USB, micro nucleus and the Digispark project. There are operational problems that suggest the USB may not be recognized by all OS’s so this would require a lot of testing. The boot-loader is also quite slow. On the up side the paper car could be self programming without needing any additional programmer. The car cost goes up the price of a USB connector but that is less than $0.50.
Power Switch
The paper car needs some sort of power switch to keep the batteries from draining. I have tried jumper clips but the students loose these very quickly making the car useless. In one design I used the foil tape as a battery disconnect which works well enough but you need elastics to hold the thing together. Options worth considering are:
- create a slot in the paper for a CR2032 coin cell and fold foil contacts onto the edge of the hole to create a contact. When the cell is inserted the car runs.
- add a $0.35 switch to the car PCB. Where to place it is problematic but I think if it was on the bottom of the PCB sticking out of a hole cut in the paper car frame things would work fairly well.
- add a coin cell holder to the PCB. Cost unknown but I doubt that it would be high if purchased from China.
Battery
The power supply to run the car needs to be in the range of 3.3 to 5V. At 3.3V the blue LEDs barely turn on so a slightly higher voltage would be better. Options
- Two AAA cells – Cons high cost of two batteries, large size, needs a battery holder. Pros great battery capacity
- Coin cell – Cons low voltage, low capacity means short run time. Pros low cost, small, with two cells we could improve the run time. Initial testing shows that the CR2032 si discharged in about 2 minutes.
- LiPo – Cons fire hazard, needs a charger, cost. Pros re-usable, high capacity, long life
- Super caps – Two 4.7F capacitors in series provides about 90 seconds of run time. While this is short, the circuit can be recharged in a matter of seconds and the circuit requires no additional components. Even the power switch can be eliminated because the car will turn itself off quite quickly. The cost is fairly high for these devices.